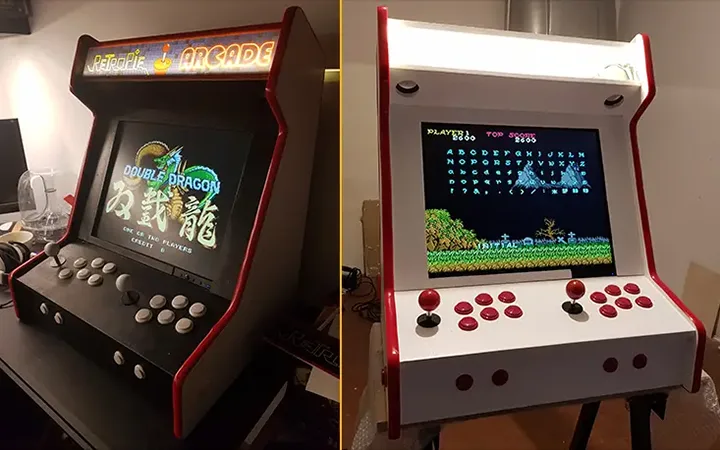
RetroPie is a fantastic project that transforms a Raspberry Pi into a retro gaming powerhouse. Here’s a detailed guide, broken down into steps, to get you up and running:
I. What You’ll Need
- Raspberry Pi: A Raspberry Pi 4 is highly recommended for best performance, especially for more demanding systems like N64, Dreamcast, and PSP. Pi 3 B+ is usable, but will struggle with some games. Pi Zero/Zero W are possible for very basic 8-bit systems.
- MicroSD Card: At least 32GB is recommended, 64GB or larger is ideal, especially if you plan on having a large game library. A fast microSD card (Class 10/UHS-I or better) is crucial for performance. SanDisk Extreme or Samsung EVO Plus are popular choices.
- Power Supply: A good quality 5V power supply. The Pi 4 needs a USB-C power supply capable of delivering at least 3A. Pi 3 B+ needs a 5V 2.5A supply.
- HDMI Cable: To connect to your TV or monitor.
- Controller(s): USB controllers are easiest. Bluetooth controllers also work, but require pairing. Popular choices include:
- 8BitDo controllers (excellent compatibility)
- Xbox controllers (wired or wireless with adapter)
- PlayStation controllers (wired or wireless with adapter)
- Case (Optional but Recommended): Protects your Pi and can improve cooling.
- Ethernet Cable (Optional): For a more stable internet connection during setup and updates. Wi-Fi works, but can be slower.
- Keyboard & Mouse (Temporary): Needed for initial setup and configuration. For games that require a keyboard (e.g., MSX), the keyboard itself can be used as a secondary controller.
II. Installing RetroPie
- Download RetroPie: Go to the official RetroPie website: https://retropie.org.uk/download/
- Choose the correct image for your Raspberry Pi model. (e.g., “Raspberry Pi 4 / 400 64-bit”)
- Flash the Image to the MicroSD Card: You’ll need a program to write the RetroPie image to your microSD card. Popular options include:
- Raspberry Pi Imager: (Recommended – easiest to use) https://www.raspberrypi.com/software/
- Etcher: https://www.balena.io/etcher/
- Win32 Disk Imager: https://win32diskimager.org/
- Using Raspberry Pi Imager:
- Insert your microSD card into your computer.
- Open Raspberry Pi Imager.
- Click “Choose OS” and select “Use custom”. Navigate to the RetroPie image you downloaded.
- Click “Choose Storage” and select your microSD card. Be absolutely sure you select the correct drive!
- Click “Write”. This process will take several minutes.
- Boot Up the Raspberry Pi:
- Insert the microSD card into the Raspberry Pi.
- Connect the HDMI cable to your TV/monitor.
- Connect the controller(s).
- Connect the power supply.
- The Pi will boot up and begin the initial setup process. This can take a while (10-30 minutes) as it expands the filesystem. Be patient!
III. Initial Configuration
- Controller Configuration:
- RetroPie will automatically detect connected controllers.
- Follow the on-screen prompts to configure your controller. You’ll be asked to map each button. This is very important for a good gaming experience.
- You can configure multiple controllers.
- Network Configuration:
- If you’re using Ethernet, it should connect automatically.
- If you’re using Wi-Fi, you’ll be prompted to select your network and enter the password.
- Expand Filesystem: (Usually done automatically, but check)
- If not already done, RetroPie will ask if you want to expand the filesystem to use the entire microSD card. Choose “Yes”.
- Update RetroPie: (Highly Recommended)
- From the RetroPie main menu, navigate to:
RetroPie->RetroPie Setup->Update RetroPie. - This will update the core RetroPie system and improve stability. It can take a significant amount of time.
- From the RetroPie main menu, navigate to:
IV. Adding ROMs (Games)
- Important Legal Note: You are responsible for ensuring you legally own the games you add to RetroPie. Downloading ROMs for games you don’t own is illegal in most jurisdictions.
- Transferring ROMs: There are several ways to transfer ROMs to your Raspberry Pi:
- USB Drive: The easiest method.
- Create a folder named
retropieon a USB drive. - Plug the USB drive into the Raspberry Pi.
- RetroPie will automatically detect the drive and create folders for each system (e.g.,
nes,snes,genesis). - Copy your ROMs into the corresponding system folders.
- After copying, safely eject the USB drive. RetroPie will automatically copy the ROMs to their final locations.
- Create a folder named
- Network Share (SMB): Allows you to access the ROM folders from your computer over the network.
- Enable SMB shares in RetroPie:
RetroPie->RetroPie Setup->Configuration / Tools->Samba. - On your computer, open File Explorer (Windows) or Finder (Mac) and enter
\\retropie(or\\<your_pi_ip_address>) in the address bar. - You’ll see the
romsfolder. Copy your ROMs into the appropriate system folders.
- Enable SMB shares in RetroPie:
- SFTP: A secure file transfer protocol. Requires an SFTP client (e.g., FileZilla).
- USB Drive: The easiest method.
- ROM File Formats: RetroPie supports various ROM formats. Common ones include:
.nes(Nintendo Entertainment System).smcor.sfc(Super Nintendo Entertainment System).genor.bin(Sega Genesis/Mega Drive).gba(Game Boy Advance).n64(Nintendo 64).iso(PlayStation, Dreamcast, etc.)
- Restart EmulationStation: After adding ROMs, restart EmulationStation (the front-end interface) to refresh the game list. You can do this from the RetroPie main menu:
RetroPie->Restart EmulationStation.
V. Customization & Advanced Options
- Scraping: RetroPie can automatically download game artwork, descriptions, and videos (called “scraping”). This makes your game library look much more appealing.
RetroPie->RetroPie Setup->Scraper. Choose a scraper (e.g., Skraper, Universal Scraper).
- Themes: Change the look and feel of EmulationStation.
EmulationStation->Main Menu->UI Settings->Theme Set.
- Overlays: Add bezels and other visual enhancements to your games.
- RetroArch: The core emulator engine. You can access RetroArch settings for advanced configuration.
- Kodi: RetroPie can also run Kodi, a media center application.
Troubleshooting Tips
- Slow Performance: Use a faster microSD card, overclock the Raspberry Pi (carefully!), or choose less demanding systems.
- Controller Not Working: Double-check the controller configuration. Try a different controller. Ensure the controller is compatible.
- ROMs Not Showing Up: Verify the ROMs are in the correct system folder and are in a supported format. Restart EmulationStation.
- Network Issues: Check your network connection. Try using Ethernet instead of Wi-Fi.
- Overheating: Use a case with a heatsink or fan.
Resources
- RetroPie Documentation: https://retropie.org.uk/docs/
- RetroPie Wiki: https://retropie.org.uk/docs/_Sidebar/
- RetroPie Forums: https://retropie.org.uk/forum/
- YouTube Tutorials: Search for “RetroPie tutorial” on YouTube for visual guides.
This guide provides a solid foundation for building your retro gaming console. Experiment, explore the settings, and have fun! The RetroPie community is very active and helpful, so don’t hesitate to ask for assistance if you get stuck.