Arduino is a fantastic platform for anyone interested in electronics, programming, and building interactive projects. Here’s a breakdown covering what it is, its components, uses, advantages, disadvantages, and where to learn more:
1. What is Arduino?
At its core, Arduino is an open-source electronics platform based on easy-to-use hardware and software. It’s designed to be accessible to artists, designers, hobbyists, and anyone interested in creating interactive objects or environments.
Think of it as a mini-computer that you can program to control the physical world. It’s not a full-fledged computer like your laptop, but it’s powerful enough to read inputs (like light, temperature, button presses) and turn them into outputs (like controlling motors, LEDs, displays).
2. Key Components
- Arduino Board (Hardware): This is the physical circuit board. There are many different Arduino boards available, each with varying features and capabilities. Some popular ones include:
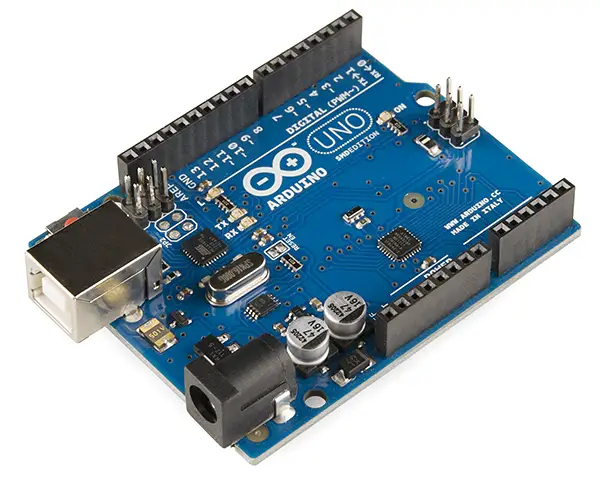
- Arduino Uno: The most popular and beginner-friendly board. A great starting point.
- Arduino Nano: A smaller version of the Uno, ideal for projects where space is limited.
- Arduino Mega: A larger board with more pins and memory, suitable for complex projects.
- Arduino Leonardo/Micro: Boards that can act as a USB keyboard or mouse.
- Arduino ESP32/ESP8266: Boards with built-in Wi-Fi and Bluetooth capabilities, perfect for IoT (Internet of Things) projects.
- Arduino IDE (Software): This is the Integrated Development Environment where you write, compile, and upload code to the Arduino board. It’s free and available for Windows, macOS, and Linux. It uses a simplified version of C++ as its programming language.
- Programming Language: Arduino uses a simplified version of C++. It’s designed to be relatively easy to learn, even for beginners.
- Shields: These are add-on boards that plug into the Arduino board to provide additional functionality, such as motor control, Ethernet connectivity, or LCD displays.
- Sensors: Devices that detect physical quantities like temperature, light, pressure, and motion. They provide input to the Arduino.
- Actuators: Devices that respond to signals from the Arduino to create a physical change, like turning on an LED, moving a motor, or playing a sound.
3. What can you do with Arduino? (Applications)
The possibilities are vast! Here are just a few examples:
- Robotics: Building robots, from simple line-following robots to more complex autonomous machines.
- Home Automation: Controlling lights, appliances, and security systems.
- Interactive Art Installations: Creating art that responds to user input or environmental conditions.
- Environmental Monitoring: Measuring temperature, humidity, air quality, and other environmental factors.
- Wearable Electronics: Building smartwatches, fitness trackers, and other wearable devices.
- Game Controllers: Creating custom game controllers.
- 3D Printing Control: Controlling and automating 3D printers.
- Internet of Things (IoT): Connecting devices to the internet to collect and share data.
- Educational Projects: Learning about electronics, programming, and engineering.
4. Advantages of Arduino
- Easy to Learn: The Arduino IDE and programming language are relatively simple to pick up, even for beginners.
- Open-Source: The hardware designs and software are freely available, allowing for customization and community contributions.
- Cross-Platform: The Arduino IDE runs on Windows, macOS, and Linux.
- Large Community: A huge and active online community provides support, tutorials, and project ideas.
- Affordable: Arduino boards are relatively inexpensive compared to other microcontroller platforms.
- Versatile: Can be used for a wide range of projects.
- Extensible: Shields allow you to easily add new functionality.
5. Disadvantages of Arduino
- Processing Power: Arduino boards have limited processing power compared to more powerful microcontrollers or computers. They’re not ideal for computationally intensive tasks.
- Memory: Limited memory can be a constraint for complex projects.
- Real-Time Performance: Not ideal for applications requiring precise timing or real-time control.
- Power Consumption: Can be relatively high for battery-powered applications (though this varies by board).
- Debugging: Debugging can be challenging, especially for beginners.
6. Where to Learn More
- Official Arduino Website: https://www.arduino.cc/ – The best place to start. Includes documentation, tutorials, and a forum.
- Arduino Project Hub: https://create.arduino.cc/projecthub – A collection of user-submitted projects.
- Instructables: https://www.instructables.com/ – A website with a large collection of DIY projects, many of which use Arduino.
- YouTube: Search for “Arduino tutorial” on YouTube. There are countless videos covering everything from basic concepts to advanced projects. Some popular channels include:
- Paul McWhorter: https://www.youtube.com/@PaulMcWhorter
- GreatScott!: https://www.youtube.com/@GreatScottLab
- DroneBot Workshop: https://www.youtube.com/@DroneBotWorkshop
- SparkFun: https://www.sparkfun.com/ – Sells Arduino boards and components, and provides tutorials and resources.
- Adafruit: https://www.adafruit.com/ – Similar to SparkFun, offering boards, components, and tutorials.
Getting Started
- Buy an Arduino Starter Kit: These kits typically include an Arduino board, a breadboard, LEDs, resistors, wires, and other components to get you started.
- Download and Install the Arduino IDE: From the official Arduino website.
- Work Through Tutorials: Start with the basic “Blink” example to learn how to upload code to the board.
- Experiment and Build Projects: The best way to learn is by doing! Find a project that interests you and start building.
Arduino is a powerful and versatile platform that can open up a world of possibilities. Don’t be afraid to experiment, ask questions, and have fun! Good luck!